Thursday, December 30, 2010

DIY: Hot Apple Pies

Posted by Katie

It's become a little tradition for my mom and me to try out new drink recipes when I come home for the holidays. Last Thanksgiving, we made these amazing Cranberry Margaritas and last Christmas we tried our hand at Mulled Wine. This year, my mom suggested that we return to a drink that she and my dad used to order during their ski trips to Tahoe: Hot Apple Pies.


Hot Apple Pies are made with Tuaca, an Italian liquor crafted from brandy, sugar, citrus and vanilla. They're so easy to make and they're nice and cozy too. Perfect for a movie night with the fam.

What You'll Need: 


- Tuaca liquor (find it at any liquor store)
- Apple cider
- Whipped cream (make your own...or not)
- Cinnamon sticks

Step 1: Warm the cider with a cinnamon stick or two
I did this on the stove, but you really could just pop the cider in the microwave. Probably without the cinnamon though.


Step 2: Pour 2 oz of Tuaca into each glass
You'll want to use Irish Coffee glasses if you have them. Those are the ones that look like this:


I don't have any of those, so my next choice would be a mug or another glass with a handle since the drinks will be warm. But sometimes you might not have those either. In that case, just make sure the cider isn't too hot so you can hold the glass comfortably.

Step 3: Fill the glasses with warm cider


Step 4: Top with whipped cream and a cinnamon stick
So easy, right?


Enjoy!

Wednesday, December 22, 2010

DIY: Pomegranate Martini

Posted by Kelly

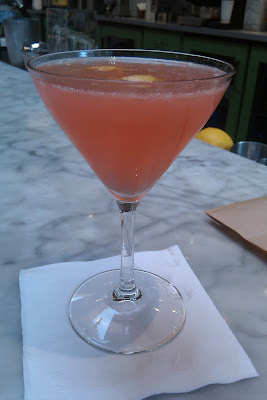
I've been through many drink phases over the years. Starting with margaritas, then a college phase of bad mixed drinks, then lemon drops, then greyhounds, and now...Pomegranate Martinis. I made them for Thanksgiving and I'm ready to make them again at Christmas (I may have even made them tonight...there's just no wrong time to make them.)

What You'll Need:
- Vodka
- Triple Sec
- Pure Pomegranate Juice (not pomegranate juice cocktail)
- Fresh Lemon Juice (lime juice works also)
- Sugar
- Pomegranate Seeds


Step 1: Juice lemons.


Step 2: Sugar rim your martini glasses.


Step 3: Combine 1.5 oz vodka, 1 oz triple sec, 1 oz pomegranate juice, and .5 oz fresh lemon juice in martini shaker. (Double to make cocktails for 2.) 


Step 4: Shake.

Step 5: Pour into your sugar rimmed martini glass and garnish with pomegranate seeds. 


Monday, December 20, 2010

DIY: Ginger Infused Vodka

Posted by Kelly


Finally, the last infusion of December, a Ginger Infused Vodka. I was inspired to make this infusion by my sister, a big fan of fresh ginger, and I think it will add a spicy, unique flavor to cocktails. Plus ginger is healthy for you right?

What You'll Need:
- 1 c. Fresh Ginger
- 750 ml Vodka
- 1 Glass Jar


Step 1: Peel and slice ginger.

Step 2: Add ginger to jar.

Step 3: Add vodka to jar and cap tightly.


Step 4: Let stand at room temperature for 48 hours, shaking gently once or twice a day.

Step 5: Taste for the preferred flavor intensity and allow to infuse up to 2 more days if needed.

Step 6: Strain vodka into original bottle then cap, label and refrigerate until ready to use. 


I hope these infusions were fun to make and inspired some "do it yourself" Christmas gifts!

Coming soon, a fabulous holiday cocktail...Pomegranate Martini!

Saturday, December 18, 2010

DIY: Pink Grapefruit Infused Vodka

Posted by Kelly


We are on the third of my four holiday infusions, are you making one each day?!

You simply can't go wrong with a citrus infused vodka. It's great for a straight up martini, lemon drop, summer cooler or citrus drop like this....(yum!)


I am especially looking forward to using this infusion in a fresh squeezed greyhound.

What You'll Need:
- 1 Large Pink Grapefruit
- 750 ml Vodka
- 1 Large Glass Jar or 2 Quart Jars
(the grapefruits take up a lot of space)


Step 1: Cut grapefruit into slices, leaving the skin on.


Step 2: Put grapefruit slices in jar(s).


Step 3: Add vodka to jar and seal tightly.


Step 4: Let stand at room temperature for 1 week and shake gently occasionally.

Step 5: Taste for preferred flavor intensity and allow to sit for another week if needed. 

Step 6: Strain vodka into original bottle then cap, label, and refrigerate until ready to use.

Just like the other recipes, I recommend a cute label, including a recipe, and a pretty bow!


Friday, December 17, 2010

DIY: Cucumber Infused Vodka (plus bonus Emlit recipe!)

Posted by Kelly

I am particularly excited about my Cucumber Infused Vodka since my favorite cocktail is currently the Emlit at Elephants Delicatessen (gin, muddle cucumber and mint, lime juice and simple syrup.) I can't wait to try it with this infused vodka!

This infusion takes 3 weeks, so it won't be poured back into the original bottle in time for Christmas, but I'm not worried since this is the prettiest of the infusions (I think.) Plus I still plan to include a labeled bottle, with accompanying drink recipe and a fancy holiday ribbon around the jar!

What You'll Need:
- 1 c. English Cucumber, Sliced
- 750 ml Vodka
- 1 Glass Jar


Step 1: Wash and slice cucumbers.


Step 2: Place cucumbers in jar.


Step 3: Add vodka to jar and cap tightly.


Step 4: Let stand at room temperature for 3 weeks, shaking gently every couple of days.


Step 5: Taste for preferred flavor intensity and allow to infuse for up to another week if needed.


Step 6: Strain vodka into original bottle then cap, label and refrigerate until ready to use. 


Below is a label idea and the infusion recipe if you want to create a DIY gift.


 I would also recommend trying the cucumber vodka in this Emlit recipe. Once I test it out in January I will be sure to report back!


 Good luck infusing!

Thursday, December 16, 2010

DIY: Espresso Infused Vodka (plus a bonus Espresso Martini recipe)

Posted by Kelly

Lets start our infusion frenzy with an Espresso Infused Vodka. This is the most simple recipe, yet sounds the most fancy. This will surely impress your friends and family, but not cause you a second of stress!

What You'll Need:
- 20 Espresso Beans
- 750 ml Vodka
- 1 Glass Jar


Step 1: Count and set aside 20 espresso beans.


They look pretty, smell wonderful, and one bag of coffee beans will make a lot of infusions!

Step 2: Put coffee beans in glass jar.


Step 3: Add vodka to jar and seal tightly.


Step 4: Let stand at room temperature for 24 hours shaking gently occasionally.


Step 5: Taste for preferred flavor intensity and allow to sit for another day if needed. 


Step 6: Strain vodka into original bottle then cap, label, and refrigerate until ready to use.


After straining the vodka back into the original bottle you have an opportunity to make your gift even more unique. You can create your own label like this one that I made:


You could also include a label or tag that suggests a drink recipe for the infused vodka.


Another cute option for an infused vodka present would be to create a "Do It Yourself" gift. Label the bottle, supply the ingredients (in cute packaging of course), and include the infusion recipe so they can try it out themselves!


Tie a fancy ribbon around the bottle and this infusion is a great Christmas present or housewarming gift for any time of year!

Wednesday, December 15, 2010

Holiday Gift Idea: Homemade Vodka Infusions!

Every Christmas I am on the look out for meaningful, fun, and affordable gifts for my friends and family. This was especially true during my college years. This year I suggest Vodka Infusions! They are easy, fairly inexpensive, and give you an opportunity to personalize your present. 

Coming soon I'll give you the recipes for four simple infusions (Ginger Vodka, Espresso Vodka, Grapefruit Vodka, and Cucumber Vodka) and special ways to spruce them up!  

Wednesday, November 17, 2010

Portland Happy Hour: Limo

Posted by Kelly
What: Limo Peruvian Restaurant
Where: 2340 NW Westover Rd
Honey's Heart: Sangria!

Every time I would go to my fav pet store on NW Westover I would walk by Limo and say "I want to try that sometime soon" and I never made it happen, but during a recent gmail chat convo with my friend Erika I discovered that she had been there and was a big fan of the sangria. We made a plan to go to happy hour and I'm so glad we did.

Of course we started with the sangria. So refreshing.


We looked over the happy hour menu and decided that it all looked good, so we chose to order a couple items and share. The classic mixed ceviche ($7) was an obvious choice. The fish mixed with octopus, calamari, shrimp, and limo chili pepper was incredible. I love seafood, and the citrus made it perfect.


Next was the fried potatoes ($4) with a yellow sauce. Yep, that's all I know about it. It was yellow and it was tasty.


Erika and I are both asparagus fans so we decided to include an order of the asparagus sprinkled with feta ($4). I like to cook asparagus at home and for some reason I had never thought to sprinkle with feta cheese. It is so good, and definitely a simple thing to make on my own! 


Our last dish was supposed to be the mussels ($4), but our waitress thought I said mushrooms and since they looked so delicious we ended up keeping them and getting the mussels. The mushrooms were cooked perfectly and the sauce was incredible. The mussels (which we forgot to photograph) were also amazing, topped with a mixture of chopped onions, tomatoes, cilantro, lime juice, and Peruvian corn (yum) with cancha corn.


Though we were happy with our food selection, we were need of another drink. Since Erika had never been to Elephants I thought it was probably my responsibility to introduce her to the unsuspectingly delicious drinks at this deli. She might look a little afraid of her "Wrong Island" in this photo, but she was really loving it!

DIY Happy Hour: Felix Felicis Potion aka Citrus & Ginger Punch

Posted by Katie

No interest in Harry Potter? Scroll down for the recipe...

If you know me outside of this blog, you know that I'm a HUGE Harry Potter fan. We probably don't need to get into the details (which may or may not include a Harry wig) but it should come as no surprise to you that I am very excited for tomorrow's midnight release of Harry Potter and the Deathly Hollows: Part One

Lauren is a huge HP fangirl too, so when we were reunited this past weekend, we decided to make up for the fact that we won't be seeing film #7 together by throwing a viewing party for film #6.

Lauren whipped up some delicious pumpkin pasties (pumpkin whoopie pies in our muggle world) to serve in addition to our dragon scales (yellow and blue tortilla chips) and troll boogies (guac). And then she set up this impressive candle-lit spread:


I put myself in charge of beverages and decided that a cauldron of Felix Felicis potion would be quite appropriate for the occasion.

Since the potion needed to be gold, the "Bourbon Ginger Snap" punch recipe I poached from my mom's December issue of Real Simple seemed like the perfect choice. Also, I'm obsessed with ginger drinks right now...


Here's the recipe:

Citrus & Ginger Punch 


Real Simple calls this "Bourbon Ginger Snap" punch. The bourbon part is good but I think the term "gingersnap" is misleading. There's nothing sugary about this punch and really, citrus is the dominate flavor, not ginger. That's why I'm calling it "Citrus & Ginger Punch". Also, don't be scared about the bourbon. I'm a gin and vodka girl through and through but I could handle the bourbon just fine.

Also, the recipe from Real Simple was for 20. We were only serving 6 so I halved the recipe. Go ahead and double it if you need too. 

Ok, let's get to it.

What You'll Need: 
- 1/2 liter Bourbon
- Fresh ginger
- 2 lemons
- 6 oranges (or orange juice if you don't have juicer handy)
- Honey
- 2 cans of Kerns pear nectar (or peach or whatever you can find)
- Water
- Ice


Step 1: Peel and slice 3 inches of fresh ginger.
Use the back of a spoon. Really, it works.


(Those are Nick's man-hands not my lady ones, just fyi.)

Step 3: Juice the lemons. You'll need 1/2 cup. 

Step 2: Heat sliced ginger, 1/2 cup lemon juice, 1/2 cup honey, and 1 quart of water.
In a large saucepan, bring the above ingredients to boil. Reduce heat to low and simmer for 5 minutes.


Step 3: Strain ginger/lemon/honey mixture. Let cool.

Step 4: Juice the oranges. You'll need 3 cups.

Step 5: Combine cooled ginger/lemon/honey mixture with 3 cups of orange juice, 2 cups pear nectar, and 1/2 liter of bourbon. 

Step 6: Serve over ice.


Enjoy!


Sunday, November 14, 2010

Boston Restaurant: Myers + Chang

Posted by Katie

What: Myers + Chang
Where: 1145 Washington St in the South End
Honeys Heart: Pork Belly Buns

For Kel's last night in Boston, we decided that we should try someplace new to both of us. We considered making our way out to Cambridge, but we were on a bit of a tight schedule so we ended up choosing the South End.

I am so tired of American cuisine, so Myers + Chang's fusion of "Chinese, Taiwanese, Thai, and Vietnamese specialties" sounded perfect.


Since it was a Saturday night and we didn't have reservations, we were in for a bit of a wait. To help pass the time, we decided to order some drinks and an appetizer at the bar.

Myers + Chang's cocktail menu has a number of innovative Asian-inspired drinks, some of which use saki and soju, a distilled liquor similar to vodka, in the place of more familiar spirits like tequila and rum.

Kel and I tried the St. Shar Pei made from soju, sake, St. Germain, green chartreuse, and grapefruit. We went for the cafare ($25) which holds about 3 cocktails.


Nothing sweet about this cocktail, but we liked this fresh take on a greyhound just fine.

For our appetizer, we ordered the Braised Pork Belly Buns ($9) with bao, brandy hoisin, and house pickles.


Just thinking about that brandy hoisin sauce makes my mouth water. It was so flavorful with the perfect amount of saltiness. And then the pork belly. Kel's East Coast trip was the first time either of us tried it and these buns just reinforced what we learned when we ordered pork belly in Brooklyn the weekend before: it's heavenly.

Once we were seated, it was time to make some more decisions. Everything on the menu looked so good, so we turned to our friendly waitress for advice.

She said that the Beef and Broccoli Chow Fun ($15) with coulotte steak and fresh rice noodles is a customer favorite...


...and we could see why. This was our second favorite dish of the night. We loved the thick chow fun noodles and the beef and broccoli had a great, if traditional, flavor.

We also tried Mama Chang's Pork and Chive Potstickers ($11).


These were nice and crispy, but we both agreed we wouldn't be opposed to nixing them to try a different dish the next time around.

Our final dish was the Asian-Braised Soft Tacos ($13) with pear, radish, and chili-sesame salsa.

We liked the idea of Asian tacos but unfortunately, they were a miss for us. I didn't like the favor of the meat and the tacos were pretty messy as the juices made the tortillas soggy and nearly impossible to eat with our hands. Oh well. 4 out of 5 ain't bad.

I should also mention that the service was amazing. The hostess chatted with us about cocktails and our waitress wasn't shy about sharing her preferences, which we appreciated.

We also liked the atmosphere of the restaurant. It was funky and fun without a drop of pretension, which can be hard to find in the South End. 

I'm already thinking about what restaurants to bring my family to in May when they visit for my graduation, and Myers + Chang now holds a place on that list. So glad we tried something new!